Table of Contents

Angular is a Google’s Typescript based web application framework unlike the Angular’s JavaScript framework (Angular JS), which had its stable version running on 1.7. Angular’s latest version is currently at 8 (8.2.14). Since it‘s based on Typescript, rather than JavaScript it is mostly user-friendly for developers to handle the code.
It follows the Model-View-Controller concept. By using this framework we can create single-page applications easily with the concept of components and material design aspects and hence Angular is generally understood as a component-driven JavaScript framework and is widely used to build applications with Single Page Architecture. In this blog, I am going to explain about Angular Elements, the feature of Angular that was added to it in version 6.
Angular elements are components of Angular, packaged as custom elements (also called Web Components). Angular Elements act as a bridge between the data and logic defined in the component and standard DOM APIs, thus, in this way, we can use Angular components in non-Angular environments.

Custom Elements are one of the key features of Web Platform that extends HTML by allowing you to define a tag to use in web pages or web applications. They can be used in any existing web application, therefore we can conclude that custom elements are custom DOM elements having their own functionality that the rest of the page doesn’t need to know anything about.
Custom elements are currently supported by Chrome, Firefox, Opera, and Safari, and available in other browsers through polyfills
We can reuse our components in any libraries/framework like React and Vue
Angular Elements allows us to develop and publish part of the application independently
Example :
# First create Angular Project with the latest Angular CLI. For installing Angular CLI run the command in the terminal:
npm install -g @angular/cli
# Create a blank application using Angular CLI
ng new angularElementsBlogDemoApp
# After creating application, add Angular Elements to our application
ng add @angular/elements
# For the browser compatibility, install some polyfill packages.
npm install @webcomponents/custom-elements
# Then update the polyfill.ts file as shown in the below

# Create one component
ng g c hello-world
The hello-world component looks like this.

# Modify app.module.ts
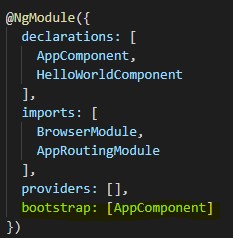
Remove AppComponent from bootstrap array and add one method named ngDoBootstrap() in AppModule class which used to bootstrap manually. Then create a customElement and register it. The updated app.module.ts file will look like below.
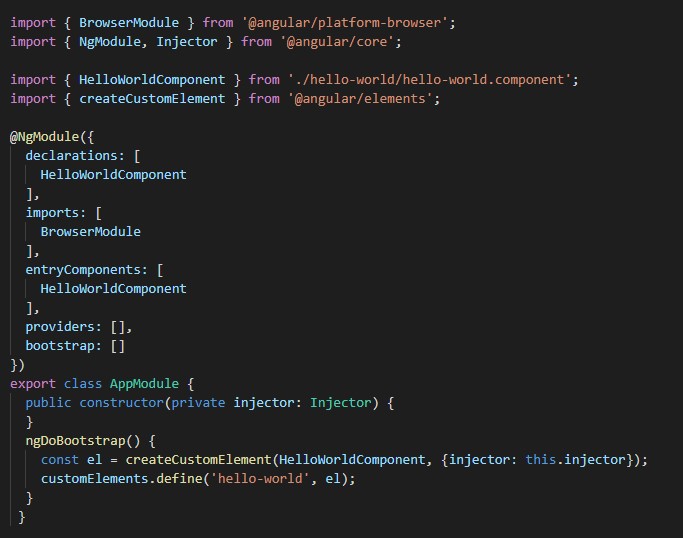
For using the created component outside Angular application we must do some adjustments to our production build.
# Take Production Build
ng build –prod –output-hashing none –build-optimizer false
Our production build generated inside the dist folder will look like the following.
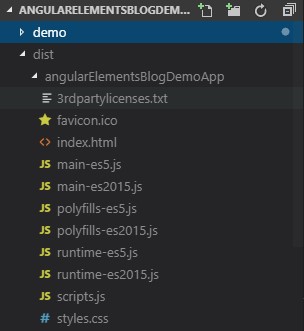
It will generate 3 different JS files – main-es2015.js,polyfills-es2015.js, and runtime-es2015.js file. So,we need to concat these three files into one single file, we will add the following packages to our application.
npm install fs-extra concat – -save-dev
# create the file build-script.js as below on the root level.
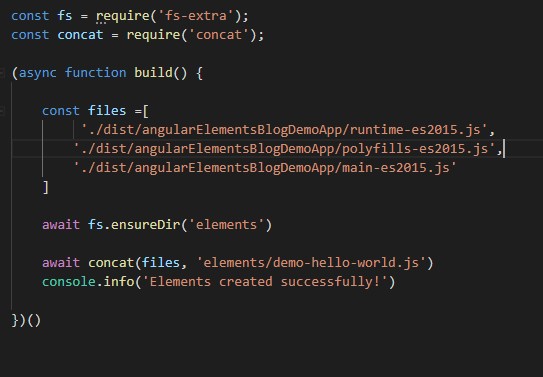
The above code will contact our JS files into a single JS file with the name of demo-counter.js inside the elements directory.
We need to add some build scripts in package.json (file as shown below), for generate a single file from build-script.js.

# Run npm run build: elements command and node build-script.js
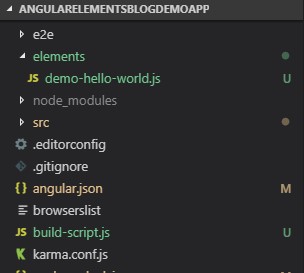
We are almost done.
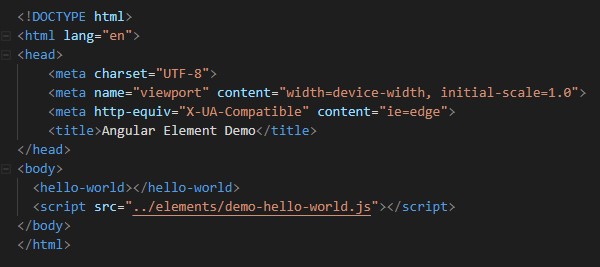
Finally, we can use our web component outside the Angular Application. For this, I created a sample HTML file and call the generated single demo-hello-world.js file inside that.
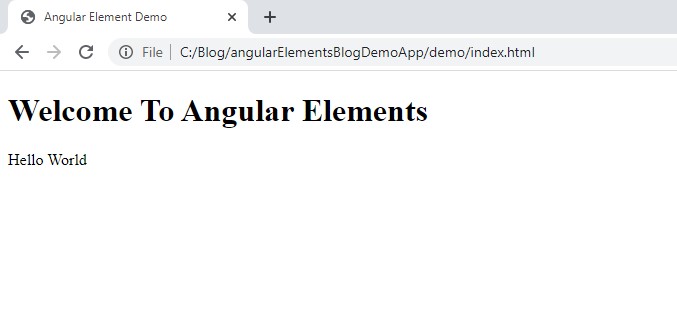
Output :
For a free consultation on IoT, Enterprise or Telecom Service, contact us at sales@thinkpalmtest.thinkpalm.info